Hi Everyone!
Sorry it has been a few days since I posted. Last week was a bit of challenge in the mom world for me. As you may remember, my daughter had her wisdom teeth taken out last week and unfortunately, she had a rough recovery, so lots of TLC was necessary. She finally turned a corner this weekend and seems to be getting back to normal. I did get some crafting done as well; but just finally got around to getting some photos done this morning.
The card for today is an Autumn themed card. I will admit, I am not one to make a lot of autumn/ Halloween type cards. I just don’t send them out to people, so they’re not really of great use to me.
Usually the only reason I make them is to have a few things to show on my blog during the Fall season. I also try to make them multi-functional such as a Thank you card.
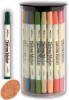
I used the Falling Leaves Background Stamp from Simon Says Stamp. This is an older stamp from last year’s Stamptember release. This stamp is perfect for a background focal point. I decided to heat emboss it and I actually did it several times before decided to mix it up a bit by using two powders: Enchanted Gold, and Copper. The copper embossing matched well with the scrap of copper paper I found in my stash.
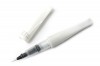
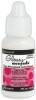
I originally white heat embossed the “Thankful” sentiment on to the copper paper; but made some mistakes, so I trimmed out the sentiment and attached it to a new piece of paper. I added some tiny hearts that I punched out and then added some sparkle with my Spectrum Noir Glitter pen and topped with glossy accents. I added some dashed white lines around the card edge as well as the bottom line of the copper sentiment piece. I added some little gemstones and sequins for final embellishments.
Have a great day everyone!
1. Crafting Happiness: Fall or Autumn
2. Crafty Cardmakers: Fall Colors
3, Creativ Fusion Arts and Crafts: Autumn
4. Get Creative Challenges: Anything Goes (3)
5. Pammies Inky Pinkies: Anything Goes
6. Shopping our Stash: Embossing
7. Through the Craft Room Door: Anything Goes
8. Tuesday Throwdown: Anything Goes
Showing posts with label Simon Says Stamp. Show all posts
Tuesday, September 24, 2019
Thursday, September 12, 2019
Sparkle and Shine Layering Stencil Shaker Card
Hi Everyone!
Thank you for visiting my blog today! I hope you are all doing well. I have been very busy formulating and designing some new Christmas crafts which I will be sharing very soon. Today, however I have a simple card that actually has a couple of detailed elements to it which make it super fun!
The inspiration for this card came from Jennifer McGuire. Whenever I am stuck for ideas of how to really use some of the supplies I have, I will visit her blog and I always find the inspiration I need! I’ve stated in some previous posts that I’ve been really trying to use my stencils a bit more. Stencils are just so inexpensive and really, once you search around and find some inspiring ideas to use them, they are a lot of fun as well. For this technique I used Jennifer’s idea of layering and rotating the stencils. You can see Jennifer’s video showcasing this fun technique here
For my card, I started with a piece of Simon Says Stamp Island Blue Card stock. (The color is a bit off in the photo, bad lighting I suppose) The stencil is from Hero Arts and I began by ink blending some Salty Ocean Distress Ink over it. Then I shifted the stencil so that it was a little off center from where it was and blended a heavy layer of Simon Says Stamp White pigment ink over it and set it off to the side to dry.
While it was drying, I made the center shaker panel. There are a wide variety of ways complete with You Tube tutorials about how to make a shaker card. I feel like I do a different way each time! For the sentiment in the center, I white embossed the “Sparkle and Shine” which is from an older Simon Says Stamp card kit set on to a a piece of heat resistant acetate.
I decided to put a small strip of white card stock across the center because the shaker circle just got lost against the stenciled background when I just had it directly against it. I added some white dashed lines around the edges of the die cut circle, and two large silver sequins to finish the card.
Ok, that is it for me today! A fun card to make, if a bit time consuming! Go check out Jennifer’s blog...she’s always great!
See you again soon..
Anything Goes Challenges:
1. Lemon Shortbread
2. Through the Craft Room Door
3. Crafting By Designs
4. Crafty Creations
5. Crafting with an Attitude
Additional challenge:
6. Simon Says Stamp Wednesday Challenge: Bling it on.
Tuesday, September 3, 2019
Stencil Ink Blending: You are the best
Hi Everyone!
I hope you’re all having a great day and enjoyed your Labor Day holiday. We are keeping a close eye on Hurricane Dorian here in Eastern North Carolina and making preparations. For now however, I have a quick card to share with you.
For this card, I used stencils from Simon Says Stamp and My Favorite Things. I started with the circle stencil from Simon first and stipple brushed a light coat of distress ink in Wilted Violet, Blueprint Sketch and Picked Raspberry. Then I laid the other sketch down positioning it the way I wanted over the circles and then used my ink blending tools to put down a slightly heavier layer of ink in the same colors.
The sentiment band is from Simon Says Stamp “You Matter” set. I probably should have centered the three smaller sentiments a little bit better; but honestly...that’s never my strong suit. I added some iridescent sequins and white dash lines to various parts of the circles for a little added interest.
Simple card overall, I think; but still with some interesting elements.
Have a great day; and I will update again as I can depending on the Hurricane Dorian situation.
Challenges:
1. A Gem of a Challenge: Anything Goes
2. Little Patch of Crafty Friends: Anything Goes
3. Get Creative Challenges: Anything Goes
4. Pammies Inky Pinkies: Anything Goes
5. Lemon Shortbread Challenges: Anything Goes
6. Through the Craft Room Door: Anything Goes
I hope you’re all having a great day and enjoyed your Labor Day holiday. We are keeping a close eye on Hurricane Dorian here in Eastern North Carolina and making preparations. For now however, I have a quick card to share with you.
The sentiment band is from Simon Says Stamp “You Matter” set. I probably should have centered the three smaller sentiments a little bit better; but honestly...that’s never my strong suit. I added some iridescent sequins and white dash lines to various parts of the circles for a little added interest.
Simple card overall, I think; but still with some interesting elements.
Have a great day; and I will update again as I can depending on the Hurricane Dorian situation.
Challenges:
1. A Gem of a Challenge: Anything Goes
2. Little Patch of Crafty Friends: Anything Goes
3. Get Creative Challenges: Anything Goes
4. Pammies Inky Pinkies: Anything Goes
5. Lemon Shortbread Challenges: Anything Goes
6. Through the Craft Room Door: Anything Goes
Friday, August 30, 2019
Copic Colored Flowers Thinking of You
Hi Everyone!
Thank you for visiting me today, I hope you’re all having a great day. I am so excited to share today’s card with you. I recently treated myself to a couple new crafty items and one of them was the Cosmos background stamp from Simon Says Stamp. I knew as soon as I saw it that the possibilities for coloring it were going to be endless! I have another example to share with you later in the week; but first, let’s talk about this one.
I stamped the background stamp in Memento Tuxedo Black ink on 80lb Neenah White card stock. I know there are a lot of Copic friendly black inks out there; but this one is my favorite. I will always reach for it first, with Simon Says Stamp Intense Black ink being a close second. I let it dry for about 15 minutes and then just for a little added insurance, I took my heating gun and just lightly ran it over the image just to make certain the ink was completely dry. Once that was done, I set to coloring. I won’t bore you with all the blending details. Let me just be clear, however, I am NOT a Copic Color artist! I’m not certified, I’ve never taken a class or anything close to it. I just do what works for me. I take the tips and tricks and tutorials I’ve seen on You Tube, Pinterest and other blogs etc and try to learn from them and then apply it. So, please don’t criticize my coloring!
Red flowers: R35, R46, R59.
Turquoise flowers: BG45, BG15, BG49.
Yellow flowers: YR15, YR16, YR09, R59
Flower centers: E25, E29
Leaves: YG03, YG17, 25, 67
Background: W1, W3
After the coloring was completed, I added some highlights with a white gel pen. I die cut my new “Thinking of You” die 3 times from white card stock and once from black card stock. I stacked all the white die cuts together and adhered them to make a 3D type sentiment and then I off centered it with the black one, to give it a bit of shadow or depth behind it. Without that black piece behind it, the white words just get lost against the background.
That finishes the card. I have to admit, I was rather tickled with the results. I hope you like it too! Have a great weekend and I will see you all again soon!
1. Addicted to Stamps and More: Anything Goes
2. Crafting by Design: Anything Goes (2nd Entry)
3. Crafty Creations Challenges: Anything Goes
4. The House that Stamps Built: Anything Goes
5. Simon Says Stamp Wednesday Challenge: Anything Goes
6.Brown Sugar Challenges: Anything Goes
7. Jo’s Scrap Shack: Anything Goes
8. Polkadoodles: Anything Goes
9. Simple Create Too: Anything Goes
Wednesday, August 28, 2019
Mojo Monday 521: Friendship has its Perks!
Good Morning Everyone!
I hope you are all having a great start to your day! I’m so glad you’re taking a moment to visit with me! Today’s card is for a Mojo Monday sketch. I haven’t done one of these in SUCH a long time! I was sad to hear Julee closed the Verve Shop last year. Many of my favorite stamp sets are from Verve and I continue to use many of them frequently. (Having said that, I did go with a stamp set from Simon Says Stamp for this one, however.)
This sketch was fun and easy to work with. I decided to break out some patterned paper for this as well. I don’t use it very often but it definitely makes the card easy to put together! I just pulled some pieces from my stash that seemed to go together.
The stamp set from Simon Says Stamp is “What’s Brewing” and it came as part of a stamping kit of the month a couple (?) of years ago. I stamped the mug from the set and then colored it with Copic Markers (E09, E19, E84, E87, E29) I stamped the “hello” sentiment in SSS dark chocolate ink and then I fussy cut it out and added it to the mug. I stamped the other sentiment in red ink (honestly...don’t remember which one) I die cut some circles, blended some ink over them for a little added color and interest. I layered the card as shown and finally added two small sequins in the corner of the small patterned paper piece and finished the card!
That is it for me today! Have a great one, and I will see you all again soon!
Challenges:
1. A Bit More Time To Craft: Anything Goes (2nd Entry)
2. Arty Divas: Anything Goes
3. Crafter’s Cafe Challenge: Dots or Stripes
4. Crafts Galore Encore: Anything Goes (2nd Entry)
5. Crafty Hazelnut’s Patterned Paper Challenge: Use patterned paper
6. Lemon Shortbread Challenges: Anything Goes
7. Mojo Monday: Sketch 521
8. Love to Craft: Anything Goes
9. Through the Craft Room Door: Anything Goes
10. The Creative Crafters: Anything Goes (2nd Entry)
Tuesday, January 10, 2017
Technique Tuesday: Distress Ink Painting Stencils
Hi Everyone!
Thank you for visiting with me again today. I hope you are all doing well. Welcome back to another Technique Tuesday. This week, I decided to use my distress inks and some paintbrushes with a stencil to make a soft imaged background. I got the idea from Pinterest…where, let’s face it we’re all getting ideas at least at some point these days, right?! I think this technique is very dependent upon the type of paintbrushes you use. I just used some cheap everyday paintbrushes I've had forever. At first, I was worried that it looked too splotchy and too rough. However, in the end, I decided that it actually looks rustic and homemade and added to the soft blurring background.
To start, I gathered my supplies: Paintbrushes, the “swirl stencil” from Hero Arts and distress inks. I chose Crushed Olive, Tumbled Glass, Dusty Concord, Walnut Stain and Rusty Hinge.
I taped down the stencil with some painters tape onto my craft sheet. Then I picked up some ink with the paintbrushes (I used a different paintbrush for each color).
I added the color to the paper through the stencil until it was complete. Adding the color was fairly quick and easy once I realized that the objective was not to get a smooth painted image.
I also found that using the paintbrushes different ways yielded different results. Going back and forth or smooshing it around for example.
When the background was complete, I removed the painters tape.
I decided to keep the focus on the background, so I just added some flowers in the center. The sentiment at the bottom is from a new SSS set I just ordered recently, called “It’s Your Birthday. I stamped the “Happy Birthday” in Dusty Concord and the “Here’s to Celebrating You” in Walnut Stain. I rounded the corners with the ¼ inch edge of the WRMK corner chomper.
I added some small clear sequins throughout the background for just a little extra bling.
I layered the panel with some foam tape onto a Neenah Solar White 110# card base.
Here's one last look at the final product. Overall I was pleased with the results!
That is it for me today. I hope you enjoy this technique and I hope you give it a try. Have a great day and I’ll see you all again tomorrow!
Challenges:
1. Inky Chicks: Anything Goes
2. Through the Craft Room Door: Anything Goes
3. Sunny Day Crafting: Arctic animals or Anything Goes
4. Creates and Makes: Anything Goes (2nd Entry)
Tuesday, September 9, 2014
Happy Thoughts: Note Card Set.
Hi Everyone!
Today, I am sharing a set of note cards I made along with a cute gift box to store them in. I love making these kinds of sets because they are perfect to give to people as last minute gifts, or an add on gift for a birthday present. They would also be perfect for teacher gifts. For this set, I wanted to make a coordinating set using Simon Says Stamp's "Lots of Dot's" set. It was a fun and simple set to put together. The color palette I used was Harvest Gold, Simply Chartreuse and Melon Berry, Kraft and Vintage Cream from Paper Trey Ink.

I hope you all have a wonderful day. If you're a crafter, I'd love to know if you have a favorite gift box for your cards? How do you give your card sets to friends?

Challenges for today's card:
Crafty Girls: Anything Goes
Crafty Desert Divas: Anything Goes
Craft Your Passion: Circles
My Craft Creations: Anything Goes
Not Just Cards: Anything Goes
Stamp and Create: Circles or Dots
Today's supplies:
Thursday, August 28, 2014
You're fantastic...and Bloglovin talk.
Hi Everyone!
Hope you are all having a wonderful week so far. Mine has been good. I wanted to share another card I made using Simon Says Stamp September Card kit. Ok, so confession time...once I got this card together and photographed, I realized that I didn't love it as much as I was hoping I would. Does that ever happen to you? I've set this one aside to ponder and maybe tweak and redo a bit at a later date. I'll be sure to share the updated version as well. However, for today it will have to do. I did have a lot of fun building the bookshelf scene with this set. This is a very fun and versatile stamp set to work with. I don't think you could ever run out of ideas for it!
Before I do the challenge list for today's card, I want to take care of a couple of blog "housekeeping" things. Honestly, if you're still reading by this point...thank you! I know many just look at the pictures and move on, which is fine. I've been know to be guilty of that as well. It's an awful habit, that I'm making efforts to squash! First, I'm looking for people to follow me on Bloglovin. If you're unfamiliar with it, it's a website that allows you to put all the blogs you follow in one place, you don't have to search through hundreds of open tabs on your computer to find the ones you want to read. I love it! It has really changed the way I read blogs and I find I'm reading more and finding more to follow as well. Right now, however I am at 6 followers! I'm grateful for those 6; but would very much like to have a few more. So, if you would please click on the "Bloglovin" tab at the top and follow me! I will absolutely follow you back.
In addition, I'm also thinking of doing a blog candy give away soon if I reach a certain number of followers. Stay tuned for more information on that.
I'm sure at this point, you're more than ready to move on with your journey through blog land or maybe you have laundry to do or a screaming baby to tend to...so I'll save the other housekeeping item for another time!
Some challenges for this card (Tuesday and Wednesday challenges from Paper Playful)
1. PDE Linky Party: Dies/Punches
2. Through the Craft Room Door: Anything Goes
3. Top Tip Tuesday: Anything Goes.
4. Tuesday Throwdown: Anything Goes
5. Tuesday Morning Sketch: Sketch
6. Crafter's Cafe: Punches/Dies
7. Inky Impressions: Anything Goes
8. Simon Says Stamp: Anything Goes
Have a wonderful day everyone! Thanks for visiting me today and I'll see you again soon!
Hope you are all having a wonderful week so far. Mine has been good. I wanted to share another card I made using Simon Says Stamp September Card kit. Ok, so confession time...once I got this card together and photographed, I realized that I didn't love it as much as I was hoping I would. Does that ever happen to you? I've set this one aside to ponder and maybe tweak and redo a bit at a later date. I'll be sure to share the updated version as well. However, for today it will have to do. I did have a lot of fun building the bookshelf scene with this set. This is a very fun and versatile stamp set to work with. I don't think you could ever run out of ideas for it!

In addition, I'm also thinking of doing a blog candy give away soon if I reach a certain number of followers. Stay tuned for more information on that.
I'm sure at this point, you're more than ready to move on with your journey through blog land or maybe you have laundry to do or a screaming baby to tend to...so I'll save the other housekeeping item for another time!
Some challenges for this card (Tuesday and Wednesday challenges from Paper Playful)
1. PDE Linky Party: Dies/Punches
2. Through the Craft Room Door: Anything Goes
3. Top Tip Tuesday: Anything Goes.
4. Tuesday Throwdown: Anything Goes
5. Tuesday Morning Sketch: Sketch
6. Crafter's Cafe: Punches/Dies
7. Inky Impressions: Anything Goes
8. Simon Says Stamp: Anything Goes
Have a wonderful day everyone! Thanks for visiting me today and I'll see you again soon!
Subscribe to:
Posts (Atom)